Claude Code/Cursor 个人配置比较
前情碎碎念:之前我的AI使用主要是以网页版的Chat or VSCode内置的Copliot使用[主要也是以对话为主],最近vscode copliot收紧了对学生的pro计划,所以就误打误撞的开发了一下其他的两个工具:Claude Code 和 Cursor。
Claude Code
省额度小妙招
Claude subscription下的claude模型自动切换:
claude
# 进入claude的交互界面
❯ /model opusplan
  ⎿  Set model to Opus 4.6 in plan mode, else Sonnet 4.6
RTK CLI 简要理解:可以把它当作对命令行调用的统一重映射入口,按你配置的规则把请求转发到不同模型/渠道,核心价值是省 token。
# install
curl -fsSL https://raw.githubusercontent.com/rtk-ai/rtk/refs/heads/master/install.sh | sh

# init
rtk init --global
Demo Init Screenshot: 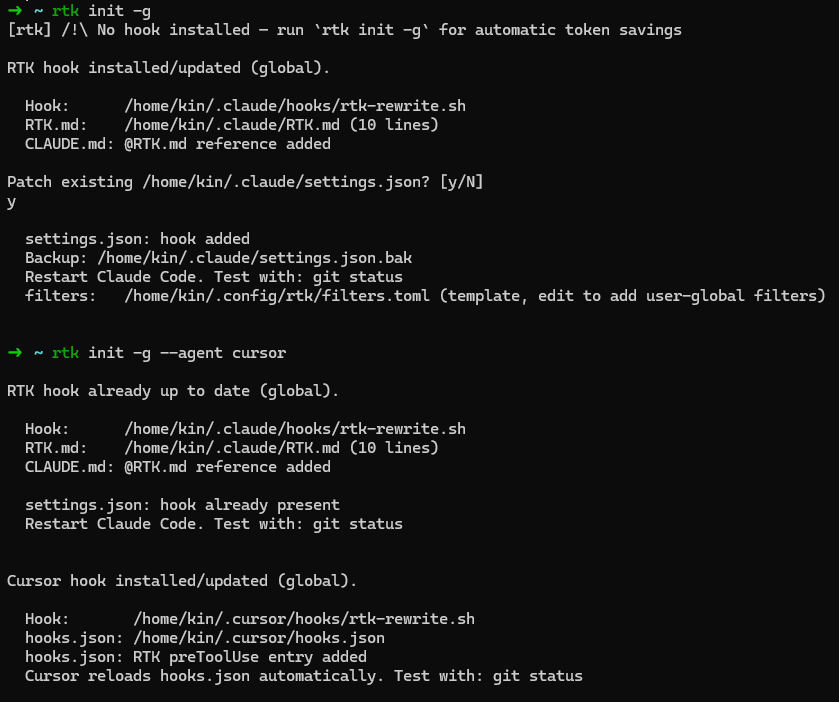
初次使用
可以在想要进行的代码workspace下进行:
claude
#
/init # 会初始化当前目录为一个claude code的workspace
保存当前对话窗口内容
# inside claude code
/export {filename}.{md|txt}
Cursor
类似于vscode里的copilot对话框,不过体感比copilot更智能一些,主要是student plan里也有claude opus的模型选项(这里给github copilot差评!): 去掉了学生优惠里的所有claude模型
plan 模型下会生成markdown文档在目录:~/.cursor/plans,过程中可以就在cursor打开并添加你的想法进去,比如告诉他们测试怎样运行,在哪个container里面之类的
vscode 界面
侧边栏的file和extension是水平在侧栏的,逼疯习惯vscode的人… 不过可以通过 左上角 Cursor → Settings → VSCode Setting → Workbench → Appearance → Activity Bar Orientation: 选择 vertical 来调整成垂直的,就可以和vscode的其他侧边栏一样了。
Enjoy Reading This Article?
Here are some more articles you might like to read next: